Sunday, January 30, 2011

Round Rainbow Card - Before and After


Before (left) and after (right). See end of post for an in-between version.

To help us learn some good principles of card design and improve our card making, Operation Write Home (OWH) is offering a series of self-paced "Saturday Seminars" on the Stars and Stamps blog. Today's seminar (the first) is "Creating a Focal Point," and the assignment is to rework some old cards over the next two weeks, using the seminar principles.

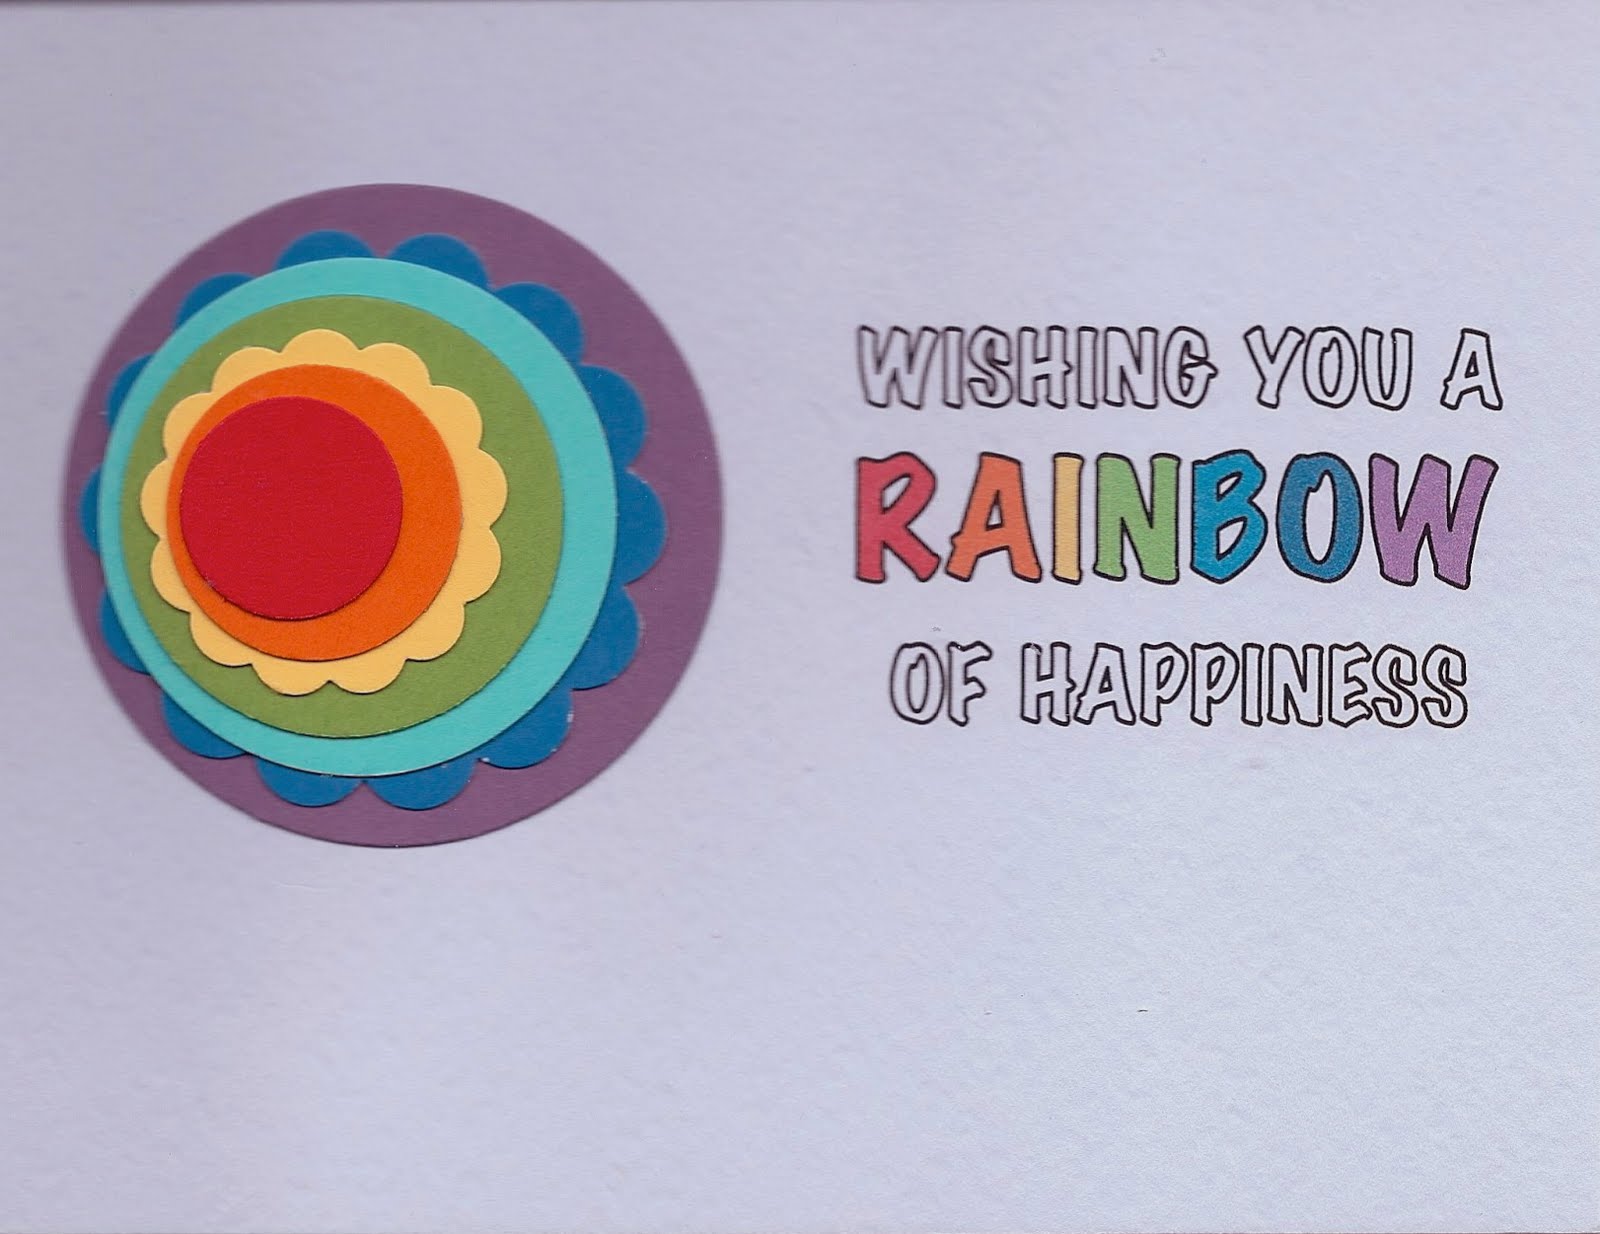
My "before" card (left) was created for the OWH "round R" challenge, using circular shapes and words or images beginning with R. I really liked my idea of "round rainbow," but the finished card just didn't make me happy. I've been wanting to go back to do something different with it, so today's seminar gave me a good excuse to work on it.

There were several different problems, but after reviewing the seminar examples, it's easy for me to see the lack of a strong focal point. My sentiment block and layered circles were visually separate and competing for attention. I like the "after" version much better.

My design changes were:
  • Moved everything closer together
  • Fitted the starting points of the sentiment lines around the circle (instead of centering the lines)
  • Spread out the letters in the sentiment (they looked crowded before)
  • Added the rainbow lines above and below the sentiment to frame it
Also, while I was at it, I corrected the "off" color of the letter B, and I colored the blue scalloped circle with B26 Copic marker, instead of my blue "before" card stock that was white on one side (white edges were showing).

January 30, 2011: But two things were still bugging me. The rainbow lines were upside-down (in a real rainbow, red is at the top), and though I tried to convince myself it was just multi-colored lines, it didn't look right to me. And it all seemed like it needed to move a bit to the left on the card. So I did another one (top right). Now I'm finally happy with it. See below for my "in-between" version.

Card details are in my original post. Created for Operation Write Home, "supporting our nation's armed forces by sending blank handmade greeting cards to write home on, as well as cards of gratitude to encourage them." (047b)

In-between version (below)

Friday, January 28, 2011

Green on Green Card

A green on green card, using a criss-cross patterned paper from my Operation Write Home paper packet, as explained in an earlier post. I thought it needed "something more," but after trying a few ideas, I decided to leave it as is.

The solid green card stock is Papertrey Ink new leaf. I don't know the name of the patterned paper. The circle punches are 1.5" plain and 2" scalloped. The ribbon is colored with G24 Copic marker. The sentiment "Thinking of you" and the dotted line are computer-printed with green ink. The font is "Perpetua Titling MT Light."

Created for Operation Write Home, "supporting our nation's armed forces by sending blank handmade greeting cards to write home on, as well as cards of gratitude to encourage them." (054a)

Sunday, January 23, 2011

Pink and Green Pattern Strip Card

A simple note card with a bright strip of apples, hearts, and flowers on a double mat. Today I made seven cards like this, using up another A2-sized piece of patterned paper from Operation Write Home, as explained in an earlier post. Each strip of pattern was a bit different. See below for another example.

The card base is Papertrey Ink (PTI) spring moss (light green), and the mats are PTI raspberry fizz (pink) and simply chartreuse (medium green). I don't know the name of the patterned paper. My sentiment "Hello" is computer-printed with "asparagus" ink in "Handwriting Dakota" font.

Created for Operation Write Home, "supporting our nation's armed forces by sending blank handmade greeting cards to write home on, as well as cards of gratitude to encourage them." (053)

Tuesday, January 18, 2011

Quilt Pattern Card - Brown with Blue and Red

My first attempt at a quilt pattern card. Nine one-inch squares, with a tenth square cut into triangles. I like it a lot. In real life, the colors look deep and rich. No sentiment seemed necessary.

It was inspired by Sherry Hickey's quilt card, posted on her blog Bits of Cheer. Thank you, Sherry! She included a link to a video tutorial that explains the technique. It was easy to do with a 1" square punch (EK Success) and a 1.5" Xyron sticker maker.

My solid-colored card stock is Papertrey Ink dark chocolate(brown) and Hero Arts punch (light red) and cerulean (blue). The patterned paper is from Operation Write Home, as explained in an earlier post. I colored my 1/2" faux button (punched from Craft-a-Board) with Copic markers B41 and B01. The knot is brown embroidery floss.

Created for Operation Write Home, "supporting our nation's armed forces by sending blank handmade greeting cards to write home on, as well as cards of gratitude to encourage them." (052)

Monday, January 17, 2011

Two Damask Cards


Two cards with damask patterned paper from Operation Write Home, as explained in an earlier post. For me, the damask pattern has an elegant, somewhat formal look, and I tried to keep that feeling in the finished cards.

The aqua card has a middle layer of Papertrey Ink aqua mist card stock, which I edged with my Fiskars "imperial" scissors. The base layer is Paper Source lake. The sentiment "Hello" is computer-printed on a 1" circle of Neenah classic cream, using "Edwardian Script ITC" font (outline) in blue ink. It is matted on a 1-1/4" scalloped circle of aqua mist.

The brown card has a base layer of Papertrey Ink dark chocolate. The 3/8" grosgrain ribbon was colored with E43 Copic marker. I edged the damask strip with E44 marker. The sentiment "Thinking of you" is computer-printed on a 1-1/2" circle of Neenah, using "Lucida Calligraphy" font in brown ink with a light beige background, edged with E43 marker. In real life, all the brown colors go together well.

Created for Operation Write Home, "supporting our nation's armed forces by sending blank handmade greeting cards to write home on, as well as cards of gratitude to encourage them." (051)

Sunday, January 16, 2011

Turquoise Card with Cocoa and Aqua Plaid

A very simple layout. I love the colors together. It didn't seem to need more.

This is another card using the packet of patterned paper from Operation Write Home, as explained in an earlier post. I made six of these cards with two A2 sheets of the plaid paper. The base layer is Papertrey Ink Hawaiian Shores. The 1/4" satin ribbon is colored with Copic marker E71. The sentiment "Hello" is computer-printed with cocoa-colored ink in Lucida Calligraphy font.

Created for Operation Write Home, "supporting our nation's armed forces by sending blank handmade greeting cards to write home on, as well as cards of gratitude to encourage them." (050)

Sunday, January 9, 2011

Purple and Yellow-Green Card - Squares and Circles

Here's another card using the patterned paper I received from Operation Write Home. Yesterday's post tells the story.

This time I chose two coordinating papers - one with stripes and one with a circle pattern. I also used the yellow-green solid color on the reverse of the circle pattern paper. It's the same layout as yesterday's card, inspired by this week's Fall-To-Layout 122 on Clean and Simple Stamping.

The purple card base is Hero Arts iris. I don't know the name of the patterned paper. My sentiment "Thinking of you" is computer-printed with Lucida Calligraphy font in purple ink. The circle punches (EK Success) are 1-1/4" scalloped and 1-1/2" plain, to make the embellishment on the striped square, and 2" scalloped for the sentiment. I also placed a 1/2" shiny clear epoxy dome sticker on the center of the embellishment.

Created for Operation Write Home, "supporting our nation's armed forces by sending blank handmade greeting cards to write home on, as well as cards of gratitude to encourage them." (049 b)

Saturday, January 8, 2011

Avocado, Orange, and Aqua Card - Squares and Circles

It was a lovely surprise to receive a packet of patterned card stock - many different patterns and colors - from Operation Write Home. One of my cards was randomly chosen from a recent challenge on the OWH Stars and Stamps blog.

Since I love working with solid colors and drawing my stripes and plaids as needed, I've never purchased "designer paper." So it will be fun to play with this assortment. All of it is precut to A2 size (4.25" x 5.5"), which makes it easy for me to work with.

I picked an interesting pattern and some coordinating solid colors. My layout was inspired by this week's Fall-To-Layout 122 on Clean and Simple Stamping. I'm happy with the result - bright and cheerful. I was able to make four cards like this with two pieces of the patterned card stock.

The solid-colored card stock is Papertrey Ink ripe avocado (card base), orange zest, and aqua mist. I don't know the name of the patterned paper. The circle punches (EK Success) are 1-1/2" and 2" scalloped. My sentiment "Thinking of you" is computer-printed with Papyrus font in avocado ink.

Created for Operation Write Home, "supporting our nation's armed forces by sending blank handmade greeting cards to write home on, as well as cards of gratitude to encourage them." (049 a)

Sunday, January 2, 2011

Dark Green and Tan Card - Squares and Circles

Playing with my punches and two new (new to me, that is) card stock colors. I like my card's clean, bold look. Added February 14, 2011: Click here for a red, white, and blue version.

The squares are 1", 1-1/4", and 1-1/2" punches, and the circles are 3/4" and 1/4". All three layered elements are the same, but one is turned diagonally.

The card stock is Papertrey Ink pinefeather (dark green) and fine linen (tan). My sentiment "Thinking of you" is computer-printed with dark green ink in Papyrus font.

Created for Operation Write Home, "supporting our nation's armed forces by sending blank handmade greeting cards to write home on, as well as cards of gratitude to encourage them." (048a)